SKU: 12393864584
tomato potting soil mix

tomato potting soil mix Espoma Potting Soil Mix - Austin, TX

Sale price$22.90 Regular price$25.44
Save 10%

Pay in installments of $6.36 with ShopPay, AfterPay and Klarna

Shipping Estimate
USA
  • USA
  • CAN

Ships within 48 hours · Estimated delivery Sep 12 - Sep 17

Promo Codes Available:

For Your Every Summer RSVP, with Code: SUMMER15

Description

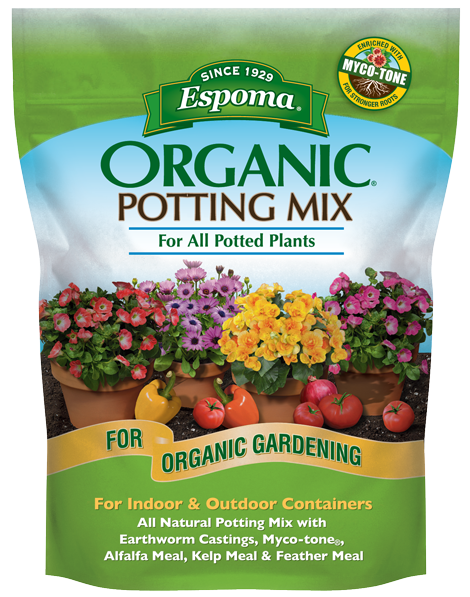
tomato potting soil mix Espoma Potting Soil Mix - Austin, TXA rich, premium blend of sphagnum peat moss, peat humus and perlite that has been enriched with Myco tone and fortified with worm castings. Espoma Organic Potting Soil Mix is ideal for all potted plants ~ indoors and outdoors. For all Indoor & Outdoor Containers Enhanced with Myco tone Fortified with Worm Castings HOW TO USE Select a container that is larger than your plants current pot, and has a drainage hole at the bottom with the tray beneath it

A rich, premium blend of sphagnum peat moss, peat humus and perlite that has been enriched with Myco-tone® and fortified with worm castings. Espoma Organic Potting Soil Mix is ideal for all potted plants ~ indoors and outdoors.
  • For all Indoor & Outdoor Containers
  • Enhanced with Myco-tone®
  • Fortified with Worm Castings
HOW TO USE
  • Select a container that is larger than your plants current pot, and has a drainage hole at the bottom with the tray beneath it to catch excess water.

  • To prevent soil from escaping, add a layer of small stones to the bottom of the container.
  • Fill container one third full with Espoma organic potting soil mix.
  • Add the appropriate amount of Espoma Organic Bio-tone Starter Plus, and mix thoroughly with the potting mix.
  • Carefully remove the plant from its current container and gently loosen the root ball.
  • Center the plant in the new container and fill it with additional potting mix.
  • Allow at least 1 inch between the rim of the pot in the top of the soil.
  • Gently pat down the mix and add more if required. Make sure the plant is about the same depth in the soil as it was in the original container.
  • Water plant thoroughly with a slow gentle spray and allowed to drain.

Growing Tips:
Re-potting: House plants require regular re-potting for optimum growth. If your plant is not growing, or you see roots growing from the drainage holes at the bottom of the pot, it’s time to re-pot to larger container.

Watering: Avoid over watering by allowing the soil to dry to the touch between watering. Use a tray or saucer to catch water as it drains from the bottom. Do not allow plants to stand in water. Outdoor container plants can require frequent watering (once per day in hot, dry conditions).

Light: Some plants thrive in direct sun exposure while others prefer shade. Check plant tag or consult your local garden center to determine preferred exposure.

Feeding: Frequent watering can easily leach nutrients out from the root zone. Feed  plants at least monthly during the growing season with an Espoma Organic Plant Food beginning two weeks after planting.


WHEN TO USE

Any time planting containers.


WHERE TO USE

Potting Soil for all indoor and outdoor container plants.


BENEFITS

Premium blend potting soil mix for beautiful plants and bountiful vegetables.

Shipping Notes
  • Free Standard Shipping on $100+ Orders to the USA.
  • Except Preorder products are shipped in 48 hours.
  • Delivery to the USA:
  1. Standard Shipping : 3-10 business days
  • If time is of the essence, please consider selecting expedited delivery for faster service.
Exchange/Return Notes
  • We offer a 30-day return/exchange service after receiving.
  • Final sale items are not eligible for returns or exchanges.
  • To process your return/exchange, please contact us at [email protected]
  • Please click here for more details>>> Return & Exchange Policy
SKU: 12393864584

Discover Niche Categories That Outsell tomato potting soil mix

Top-Converting Item to Boost Your Average Order

4.8 ★★★★★
Based on 18 reviews
Sort
Highest Rating
Newest First
Oldest First
Product Reviews
E
Verified Purchase
Elkhorn_Customs
Waukegan, US
★★★★★ 5
Works great
Color: Black
Quality wine opener kit.
WAS THIS REVIEW HELPFUL?YesReportShare
Reviewed in the United States on March 30, 2026
P
Verified Purchase
Paula
Massapequa, US
★★★★★ 5
Best Wine Opener We’ve Tried
Color: Black
My husband and I like to think of ourselves as wine connoisseurs, and over the years we’ve been through dozens of wine openers. So far, this one is our favorite. It’s pure magic—smooth, easy, and reliable every time. The charging base keeps everything organized. We’ve been using it for several months now without a single issue. It feels well-made and has definitely earned a permanent spot on our counter. It works so seamlessly that now we both want to open the wine.
WAS THIS REVIEW HELPFUL?YesReportShare
Reviewed in the United States on August 25, 2025
A
Verified Purchase
Amazon Customer
Carnegie, US
★★★★★ 5
The PERFECT CORKSCREW
Color: Silver
Sturdy. Easy to use
WAS THIS REVIEW HELPFUL?YesReportShare
Reviewed in the United States on June 7, 2026
J
Verified Purchase
John & Janet
Belleville, US
★★★★★ 5
I like it cause it works
Color: Silver
Amazing, opens wine bottles like it's 1999 and works no matter what. Get one, now.
WAS THIS REVIEW HELPFUL?YesReportShare
Reviewed in the United States on May 29, 2026
S
Verified Purchase
SC Power Engineering Co.
Lowell, US
★★★★★ 5
Excellent build quality and thick chrome, strong threaded screw
Color: Silver
I purchased this as a gift for a friend that had problems with wine corks being broken and left inside the bottle. The intention was to have this longer tapered screw extend all the way beyond the bottom of the cork to pull out the entire cork without leaving pieces inside the bottle. One detail that is missing from the instructions is the secret to how a wine cork remover must be used to insure success. The tapered screw must be twisted many turns, which will raise the two lever arms directly upwards away from the bottle. It is critical that you keep turning the screw and remove the metal or paper seal that is on the outside of the bottle before you stop turning. By looking at the bottom of the cork inside the bottle, you can watch the end of the tapered screw appear as it is turned deep inside the cork, beyond the bottom of the cork. Once you have visual verification that the screw is all the way in, notice the appearance of the TOP of the screw outside the cork. You will see that it appears to have been turned very far, potentially damaged the outer surface of the cork. That is a GOOD sign that you used enough rotations of the screw to correctly engage the entire cork. Never skip these steps before you proceed to remove the cork. When the screw is in the correct position, the two levers are all the way up. It may take some force to push them down, so put the wine bottle in a SINK, not a countertop. This lowers the bottle for easier access and gives you a safe place to put the cork remover after you open the bottle. Using a controlled force with both hands, move both levers down carefully to make sure that you do not deflect the tapered screw in a way that is misaligned with the neck of the bottle. As the cork is removed, the last part may be fragile from contact with the wine. In addition, the entire cork remover becomes less stable, and free to pivot if you are not careful. This last motion can still damage a cork and create fragments, so just be careful and precise to gently pivot the levers all the way down and then if necessary use a twisting motion to ease the last part of the cork out of the bottle. This method has never failed to remove hundreds of corks from bottles made all over the world without wrecking the cork. Try it and you will never have a broken cork problem again.
WAS THIS REVIEW HELPFUL?YesReportShare
Reviewed in the United States on September 7, 2022

recommand products