Pay in installments of $5.00 with
 ,
,
 and
and

Shipping Estimate
USA
- USA
- CAN
- USA
- CAN
Ships within 48 hours · Estimated delivery Sep 9 - Sep 14
 Promo Codes Available:
For Your Every Summer RSVP, with Code: SUMMER15
Description
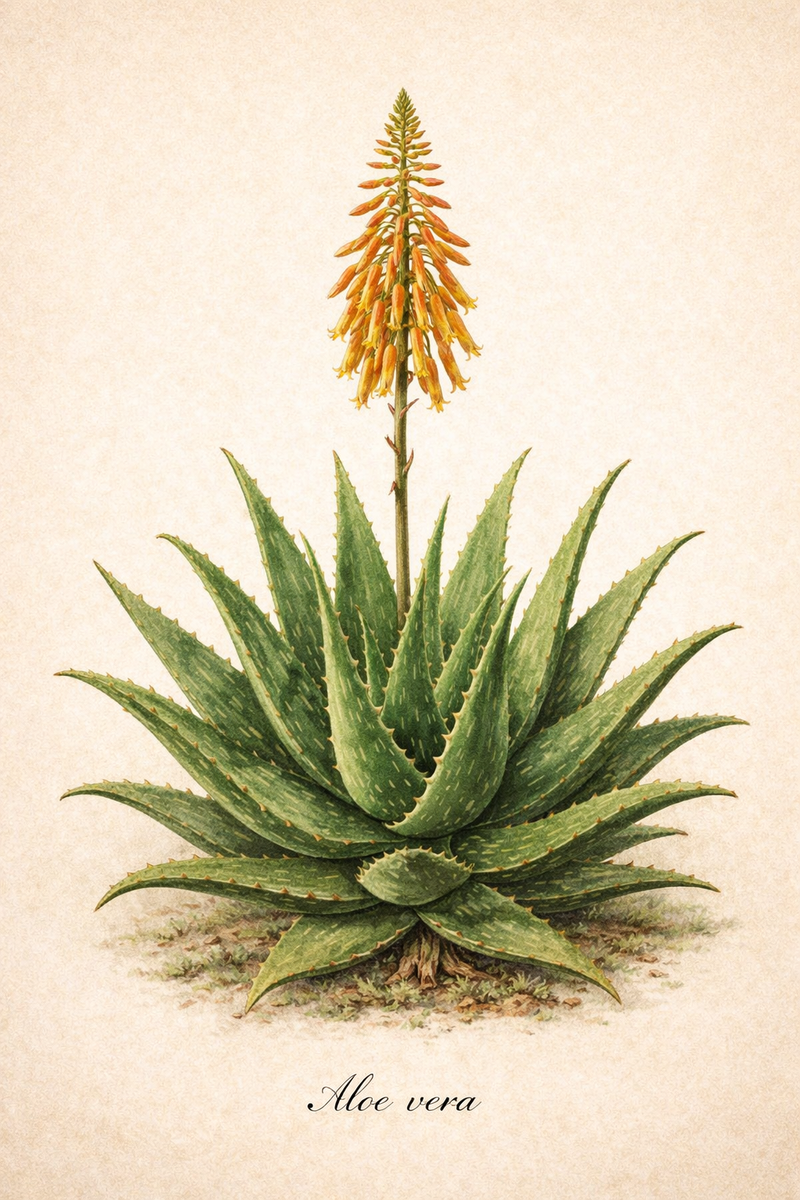
aloe vera plant texas Aloe Vera – Texas Tree FarmsAloe vera, also known as Aloe barbadensis, is a perennial succulent plant belonging to the Asphodelaceae family and native to the Arabian Peninsula. It has thick, fleshy, lance shaped leaves that grow in a rosette pattern from a central stem. The leaves are typically green to gray green in color and have serrated edges with small white teeth. Mature plants may produce tall flower spikes adorned with tubular yellow or orange flowers. Aloe vera is
Aloe vera, also known as Aloe barbadensis, is a perennial succulent plant belonging to the Asphodelaceae family and native to the Arabian Peninsula. It has thick, fleshy, lance-shaped leaves that grow in a rosette pattern from a central stem. The leaves are typically green to gray-green in color and have serrated edges with small white teeth. Mature plants may produce tall flower spikes adorned with tubular yellow or orange flowers. Aloe vera is primarily grown for its foliage and gel-filled leaves which are famous for their cooling effect on burns and skin irritations.
|
Scientific Name |
Aloe vera (syn. Aloe barbadensis) |
|
Foliage: Evergreen |
Leaves: The thick, lance-shaped leaves are gray-green (sometimes spotted with white when young). The edges are lined with small, soft white teeth. Flowers: Mature plants (usually 4+ years old) produce a tall spike in summer topped with tubular yellow flowers. Aloe vera typically blooms in the late winter to early summer, with the peak flowering period usually occurring in spring (March through May). |
| Lifespan: Polycarpic Perennial | Unlike the 'Agave Whale's Tongue', which bloom once and die, a mature Aloe vera can bloom every year once it reaches reproductive maturity. The average lifespan for an indoor potted Aloe vera is 10 to 20 years and the average lifespan for an outdoor lifespan is 20 to 100 years. Even if the original "mother" plant eventually dies after 15 or 20 years, she will have produced dozens of genetically identical clones around her base. This allows the cluster to survive almost indefinitely if left undisturbed. |
|
Mature Height |
1-2 feet (flower stalks can reach 3 feet) |
|
Mature Width (Spread) |
1-2 feet (clumps can spread wider via "pups") |
|
Growth Rate |
Slow to Moderate |
|
USDA Zone |
Zone 8-11 (Best outdoors in 9-11; needs protection below 25 degrees F) |
PLANT CARE & CHARACTERISTICS
Light Requirements: Bright Indirect Light to Full Sun. Indoors, it needs a very sunny window. Outdoors, it prefers full sun but appreciates some light afternoon shade in blistering desert climates to prevent the leaves from turning orange or "sunburnt." When grown indoors, place Aloe vera near a south- or west-facing window where it can receive plenty of sunlight throughout the day.
Water Requirements: Low. Aloe stores water in its fleshy leaves. The "soak and dry" method is best: water deeply, then allow the soil to dry out completely (at least the top 2 inches) before watering again. Over-watering is the most common cause of death, root rot.
Drought Resistance: Exceptional. It is highly adapted to arid conditions and can survive long periods without supplemental water, though it looks "plumper" and healthier with occasional deep watering.
Soil Type: Gritty and Well-Drained. It requires a sandy or rocky soil mix. It will not tolerate "wet feet." In pots, a cactus or succulent potting mix is essential. A well-draining pot is important to prevent water-logging and root rot.
Deer Resistance: High. Deer generally find the thick, bitter sap and the prickly margins of the leaves unpalatable.
Pest/Disease Resistance: Moderate to High. If kept in the correct environment (low humidity, well-draining soil, and high light), Aloe vera rarely suffers from disease. For common pests like mealybugs, a cotton swab dipped in 70% isopropyl alcohol can be used to dab them away. For fungal spots, improving air circulation and keeping the leaves dry is usually enough to stop the spread.
| Issue | Description & Symptoms |
| Aphids / Mealybugs | Small, sap-sucking insects that hide in the crevices of the leaves. You may see "honeydew" (sticky residue) or white, cottony clusters. |
| Aloe Mite | Microscopic mites that cause "Aloe Gall"—an ugly, cancerous-looking growth or "wart" on the leaves or flower stalks. |
| Snout Beetle | A more serious pest that bores into the center of the plant to lay eggs; the larvae then eat the plant from the inside out. |
| Root Rot | The most common killer of Aloe. Caused by overwatering or poor drainage. Leaves will turn mushy, brown, or translucent at the base. |
| Fungal Leaf Spot | Appears as small, dark brown or black spots on the leaves, often triggered by water sitting on the foliage in cool temperatures. |
| Aloe Rust | A fungal infection that creates permanent black spots. It isn’t usually fatal but can ruin the plant's aesthetic. |
Pollination: Aloe vera is generally self-incompatible, meaning a single plant cannot pollinate itself. To produce viable seeds, you typically need two different clones blooming at the same time.
HARVEST
| Feature | Guideline |
| Maturity | Only harvest from plants that are at least 3 years old. Younger plants do not have the same concentration of active medicinal compounds. |
| Which Leaves? | Always harvest the outermost, bottom leaves. These are the oldest and largest. Never harvest from the center "crown," as this is where the new growth happens. |
| Technique | Use a sharp, clean knife. Cut the leaf as close to the main trunk as possible at a slight downward angle. Avoid "snapping" the leaf by hand, which can tear the plant's tissue. |
| The "Bleed" | After cutting, stand the leaf upright in a container for 10–15 minutes. A yellow sap called aloin (latex) will drip out. This substance is a strong laxative and skin irritant; most people prefer to drain it before using the clear inner gel. |
| Frequency | Do not remove more than 20–30% of the plant's total leaves at one time. If you over-harvest, the plant will become stunted. |
STORAGE/SHELF LIFE
| Form | Storage Method | Shelf Life |
| Whole Leaf (Fresh) | Room Temperature (Cool/Dark) | 1 to 2 days |
| Whole Leaf (Fresh) | Refrigerated (Wrapped in plastic) | 1 to 2 weeks |
| Extracted Gel (Pure) | Refrigerated (Airtight container) | 5 to 7 days |
| Extracted Gel (Pure) | Frozen (Ice cube trays) | 6 to 8 months |
| Extracted Gel (Preserved) | Refrigerated (With Vitamin C/E) | 1 to 2 months |
Best Practices for Maximizing Shelf Life
1. The "Yellow Sap" Drain: As mentioned during harvesting, always allow the yellow liquid (aloin) to drain out for 10–15 minutes before storing or processing the gel. This liquid oxidizes quickly and can spoil the clear gel if left inside.
2. Preventing Oxidation: Once the clear gel is exposed to air, it begins to lose its potency. If you are storing extracted gel in the fridge, fill the container to the top to minimize the amount of oxygen inside.
3. Natural Preservatives: If you need the gel to last longer than a week without freezing, you can blend in Vitamin C powder (ascorbic acid) or Vitamin E oil. This helps stabilize the gel and acts as an antioxidant.
4. Signs of Spoilage: You should discard Aloe vera if you notice any of the following:
- Smell: A strong, sour, or "pungent" odor (fresh aloe should have a very mild, grassy scent).
- Color: The clear gel turns deep pink, brown, or dark gray.
- Texture: The gel becomes excessively watery or develops mold on the surface.
PRUNING
| Aspect | Recommendation |
| Primary Goal | To remove dead, damaged, or diseased leaves and to harvest healthy leaves for use. |
| Target Leaves | Focus on the outermost leaves at the base of the plant. These are the oldest and most likely to show wear or be ready for harvest. |
| When to Prune | Any time of year, though spring or summer is ideal as the plant is in its active growth phase and will heal faster. |
| The "Crown" Rule | Never prune the center of the plant (the "crown"). This is the growth point; if damaged, the plant may stop growing or die. |
| Managing "Pups" | If the pot is getting crowded, pruning includes removing the small "pups" (offsets) at the base to redirect energy to the mother plant. |
Step-by-Step Pruning Process
1. Sanitize Your Tools: Use a sharp knife or garden shears cleaned with rubbing alcohol. This prevents the spread of fungal diseases like Aloe Rust.
2. Assess the Plant: Look for leaves that are turning brown, shriveled, or have dark spots. These should be your first priority for removal.
3. The Cut: Place your blade as close to the main stem as possible. Cut at a slight downward angle. Avoid leaving "stubs" of leaves, as these can rot.
4. Harvesting vs. Maintenance: If the leaves are healthy but the plant is simply too large, you can harvest these healthy outer leaves for their gel (see storage info above).
5. Remove Pups: If you want a single, large specimen, use a trowel to gently separate the babies (pups) from the mother plant's roots. These can be repotted into new containers.
6. Aftercare: After a heavy pruning session, avoid watering the plant for 2–3 days. This allows the "wounds" on the stem to callus over, which acts as a natural seal against bacteria and rot.
Essential Safety Note
Aloin Awareness: When you prune, the plant will "bleed" a yellow, latex-like sap called aloin. This can be a skin irritant for some people. If you have sensitive skin, it is a good idea to wear gloves.
Spines: While Aloe vera spines are softer than those on an Agave, they can still be prickly. Handle with care to avoid small scratches.
Shipping Notes
- Free Standard Shipping on $100+ Orders to the USA.
- Except Preorder products are shipped in 48 hours.
- Delivery to the USA:
- Standard Shipping : 3-10 business days
- If time is of the essence, please consider selecting expedited delivery for faster service.
Exchange/Return Notes
- We offer a 30-day return/exchange service after receiving.
- Final sale items are not eligible for returns or exchanges.
- To process your return/exchange, please contact us at [email protected]
- Please click here for more details>>> Return & Exchange Policy