Pay in installments of $6.24 with
 ,
,
 and
and

Shipping Estimate
USA
- USA
- CAN
- USA
- CAN
Ships within 48 hours · Estimated delivery Oct 11 - Oct 16
 Promo Codes Available:
For Your Every Summer RSVP, with Code: SUMMER15
Description
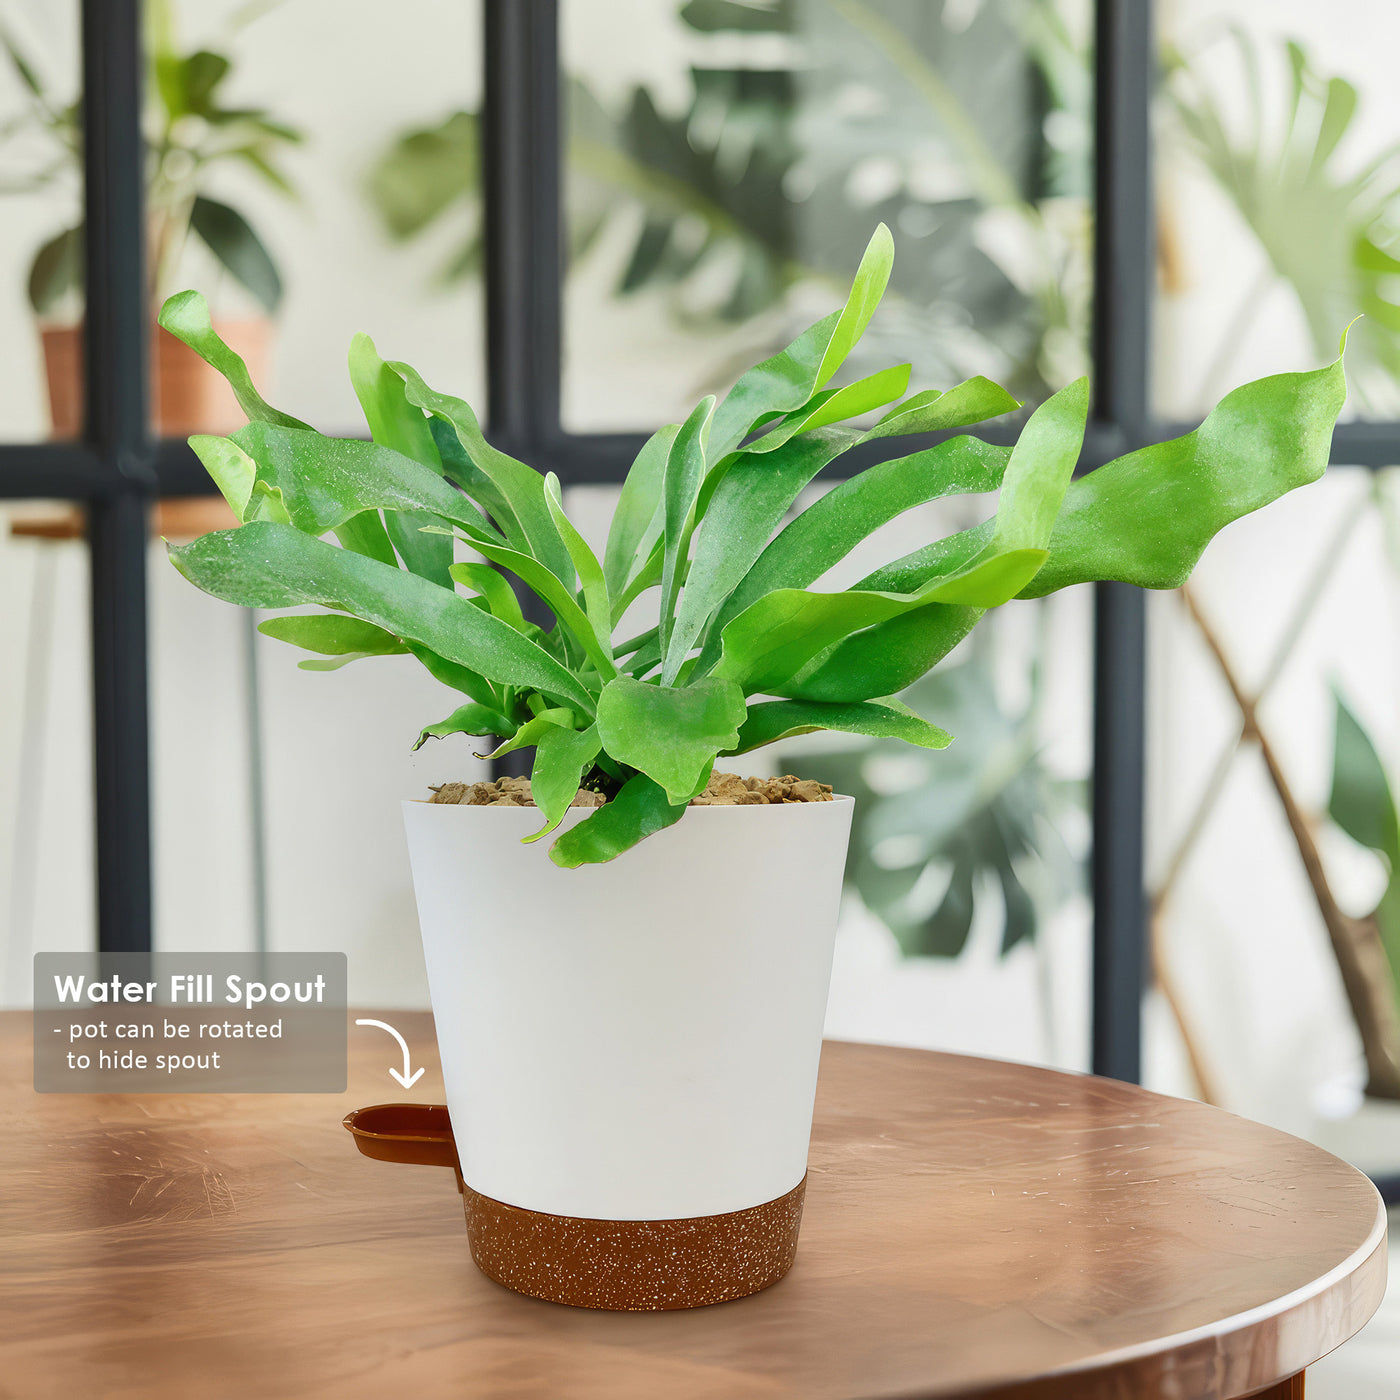
bird nest fern vs staghorn Staghorn Ferns Plants ‘Platycerium bifurcatum’ 2 Gal. / Self Watering / Without PotThe staghorn fern, known as Platycerium bifurcatum, is an epiphytic plant, meaning it grows on other plants or objects for support without being parasitic. This type of fern is widely recognized for its antler shaped fronds, which mimic deer or elk horns, earning it the nickname elkhorn fern. As epiphytes, staghorn ferns dont require soil to grow; theyre often found clinging to trees in their natural habitat. Like air plants, opens in a new tab, this
The staghorn fern, known as Platycerium bifurcatum, is an epiphytic plant, meaning it grows on other plants or objects for support without being parasitic. This type of fern is widely recognized for its antler-shaped fronds, which mimic deer or elk horns, earning it the nickname “elkhorn fern.” As epiphytes, staghorn ferns don’t require soil to grow; they’re often found clinging to trees in their natural habitat.
Like air plants, opens in a new tab, this elkhorn fern, which is popular among plant enthusiasts and collectors, thrives in a variety of settings, including mounting on walls, growing in hanging baskets, and placing on tree trunks.
Additionally, its adaptability to indoor and outdoor environments, air-purifying properties, and pet-safe nature further enhances its appeal for homes, offices, and gardens.
Native to Asia and Australia, this mounted Staghorn fern is distinguished by its unique shape.
The fern's leaves come in two different varieties: shield fronds, which are small, flat leaves that cover and shield the root ball structure, and antler fronds, which are green and pronged and grow up to 3 feet long indoors (and larger in the wild).
These fronds are often coated with a fuzzy, grayish texture, which helps the plant retain moisture and protect against pests.
Staghorn ferns reproduce from spores that grow on the underside of their fertile fronds, a characteristic that sets them apart from most flowering plants. These spores are part of the plant's reproductive cycle, allowing it to propagate without producing traditional blooms.
The Elkhorn fern is valued for more than just its beauty. It improves air quality by absorbing toxins and releasing oxygen, making it an excellent addition to indoor spaces. Its pet-safe nature ensures peace of mind for households with animals. Moreover, its ability to grow vertically on other plants for support makes it a space-saving option for urban gardens or compact homes, adding greenery without taking up floor space.
When and How to Water Your Staghorn Ferns Plants
Staghorn fern plants are drought-tolerant epiphytes, naturally adapted to thrive in minimal soil and survive with infrequent watering. In their native tropical environments, they absorb moisture from the air, so they don’t require constant watering like many other houseplants. However, neglecting water for too long can cause the plant to dehydrate and lose vitality. Their unique ability to store water allows them to endure short dry periods, but consistency is key to keeping them healthy.
In the spring and summer, during the growing season, staghorn fern plants are more active and require more frequent watering. Water them once a week, ensuring the root ball or mounting material is soaked thoroughly. Submerge the plant or its base in water for 15–20 minutes to allow the roots to absorb moisture, and let it drain completely to prevent root rot. Monitor humidity levels, as these plants thrive in 50–70% humidity, and adjust your watering schedule if your indoor environment is dry.
In the fall and winter, during the dormant season, reduce watering to every two to three weeks, as the plant’s growth slows. During this time, ensure the mounting material dries out slightly between waterings. Overwatering can lead to root rot and fungal issues, so focus on maintaining consistent, light moisture rather than saturation. If the air is particularly dry, mist the plant occasionally to maintain adequate humidity.
Light Requirements – Where to Place Your Staghorn Ferns
When growing indoors, Staghorn ferns thrive in bright, indirect light, mimicking the dappled sunlight of their native forest canopies.
Place your plant near an east- or north-facing window for gentle morning light or filtered brightness.
Avoid direct sunlight, which can scorch the fronds. Aim for 6 to 8 hours of indirect light daily.
If your home lacks natural light, a grow light can supplement their needs.
For outdoor cultivation, this fern plant prefers partial shade, such as under the canopy of trees or on a shaded patio.
They should receive about 4 to 6 hours of filtered light daily. In cooler climates, they can tolerate more sun if placed in a spot with protection from the harsh midday rays.
Ensure they are shielded from intense direct sunlight to avoid damage to their delicate fronds.
Optimal Growing Medium & Fertilizer Needs
Unlike true air plants, which never require soil, staghorn ferns can tolerate being grown in a well-draining, loose soil mix temporarily, but this is not their ideal setup. Their ability to absorb moisture and nutrients from the air makes them better suited to an epiphytic lifestyle, and mounting allows their roots to breathe and prevents waterlogging, which is critical for their health.
Over time, the plant's new fronds will grow and conceal the mounting material, creating a lush, layered look. While staghorn ferns grow slowly, mature plants can become large and heavy, potentially requiring remounting on a larger support. Ensure the mounting material is secured firmly to support the fern’s weight.
Staghorn ferns should be fertilized once a year, in the spring, with a balanced, water-soluble NPK fertilizer in a 5-10-5 ratio. Apply the solution directly to the base of the fronds or soak the mounting material. Avoid fertilizing during the dormant season to prevent stress on the plant.
Hardiness Zone & More
When grown indoors, staghorn ferns prefer a temperature range of 60–80°F. Avoid exposing them to drafts, sudden temperature changes, or temperatures below 50°F, as they are sensitive to cold. While indoors, ensure they receive sufficient bright, indirect light for 6 to 8 hours daily.
For outdoor cultivation, Staghorn ferns are hardy in USDA zones 9–11, where temperatures rarely drop below freezing. In these zones, they can be grown year-round outdoors in shaded or partially shaded locations.
Ensure they are sheltered from extreme sun exposure and frost. In cooler zones, bring them indoors during winter months to protect them.
Wildlife – Staghorn Fern Attracts the Following Friendly Pollinators
Staghorn ferns attract a variety of pollinators, such as bees, butterflies, and hummingbirds, which often visit the plant for its moisture and nutrient-rich habitat. These insects can aid in the natural decomposition process of organic matter on the mounting base, indirectly benefiting the fern.
According to the ASPCA, staghorn ferns are non-toxic to humans, cats, dogs, and other pets. This makes them a safe choice for households with animals, offering a beautiful and pet-friendly greenery option.
How to Propagate Your Staghorn/Elkhorn Ferns Plants
The staghorn fern plant can be propagated through division. Identify a healthy pup (a small offshoot of the main plant) with its own set of fronds and roots. Carefully separate the pup from the parent plant using a clean, sharp knife or pruning shears. Ensure the pup has enough root material attached to establish itself. Mount the pup onto a new base of sphagnum moss or bark, securing it with a fishing line or twine. Keep the new mount in bright, indirect light, and maintain consistent humidity and watering until the pup establishes.
Key Takeaways
- Staghorn ferns are named after their antler-like fronds, which resemble the horns of deer or elk, and are therefore also known as Elkhorn ferns, making them a highly decorative plant.
- This species is epiphytic, meaning it naturally grows on trees or other surfaces without soil, deriving nutrients from organic matter and moisture in the air.
- This mounted Staghorn fern is a non-flowering plant, reproducing through spores located on the underside of its fertile fronds.
- Staghorn ferns are drought-tolerant but require consistent humidity to thrive, making them ideal for humid bathrooms or shaded patios.
- According to ASPCA, they are considered pet-safe, as they are non-toxic to cats and dogs.
- Due to their lightweight and space-saving growth, they are an excellent choice for urban gardens or small indoor spaces.
The Bottom Line
Overall, the staghorn fern (or Elkhorn fern) is a remarkable plant celebrated for its antler-like fronds, epiphytic growth habit, and ability to thrive with minimal soil. Its unique features, including sterile fronds for anchoring and fertile fronds for reproduction, make it a standout in both indoor and outdoor spaces. This fern is easy to care for, requiring bright, indirect light, consistent humidity, and occasional watering, with the base allowed to dry out between waterings. The staghorn fern, whether mounted on wood or grown in hanging baskets, adds an exotic and space-saving element to any setting. With proper care, this non-toxic, air-purifying plant can flourish for years, making it a stunning and practical choice for plant enthusiasts. Order your very own Staghorn fern for sale today!
Shipping Notes
- Free Standard Shipping on $100+ Orders to the USA.
- Except Preorder products are shipped in 48 hours.
- Delivery to the USA:
- Standard Shipping : 3-10 business days
- If time is of the essence, please consider selecting expedited delivery for faster service.
Exchange/Return Notes
- We offer a 30-day return/exchange service after receiving.
- Final sale items are not eligible for returns or exchanges.
- To process your return/exchange, please contact us at [email protected]
- Please click here for more details>>> Return & Exchange Policy