Pay in installments of $6.36 with
 ,
,
 and
and

Shipping Estimate
USA
- USA
- CAN
- USA
- CAN
Ships within 48 hours · Estimated delivery Oct 21 - Oct 26
 Promo Codes Available:
For Your Every Summer RSVP, with Code: SUMMER15
Description
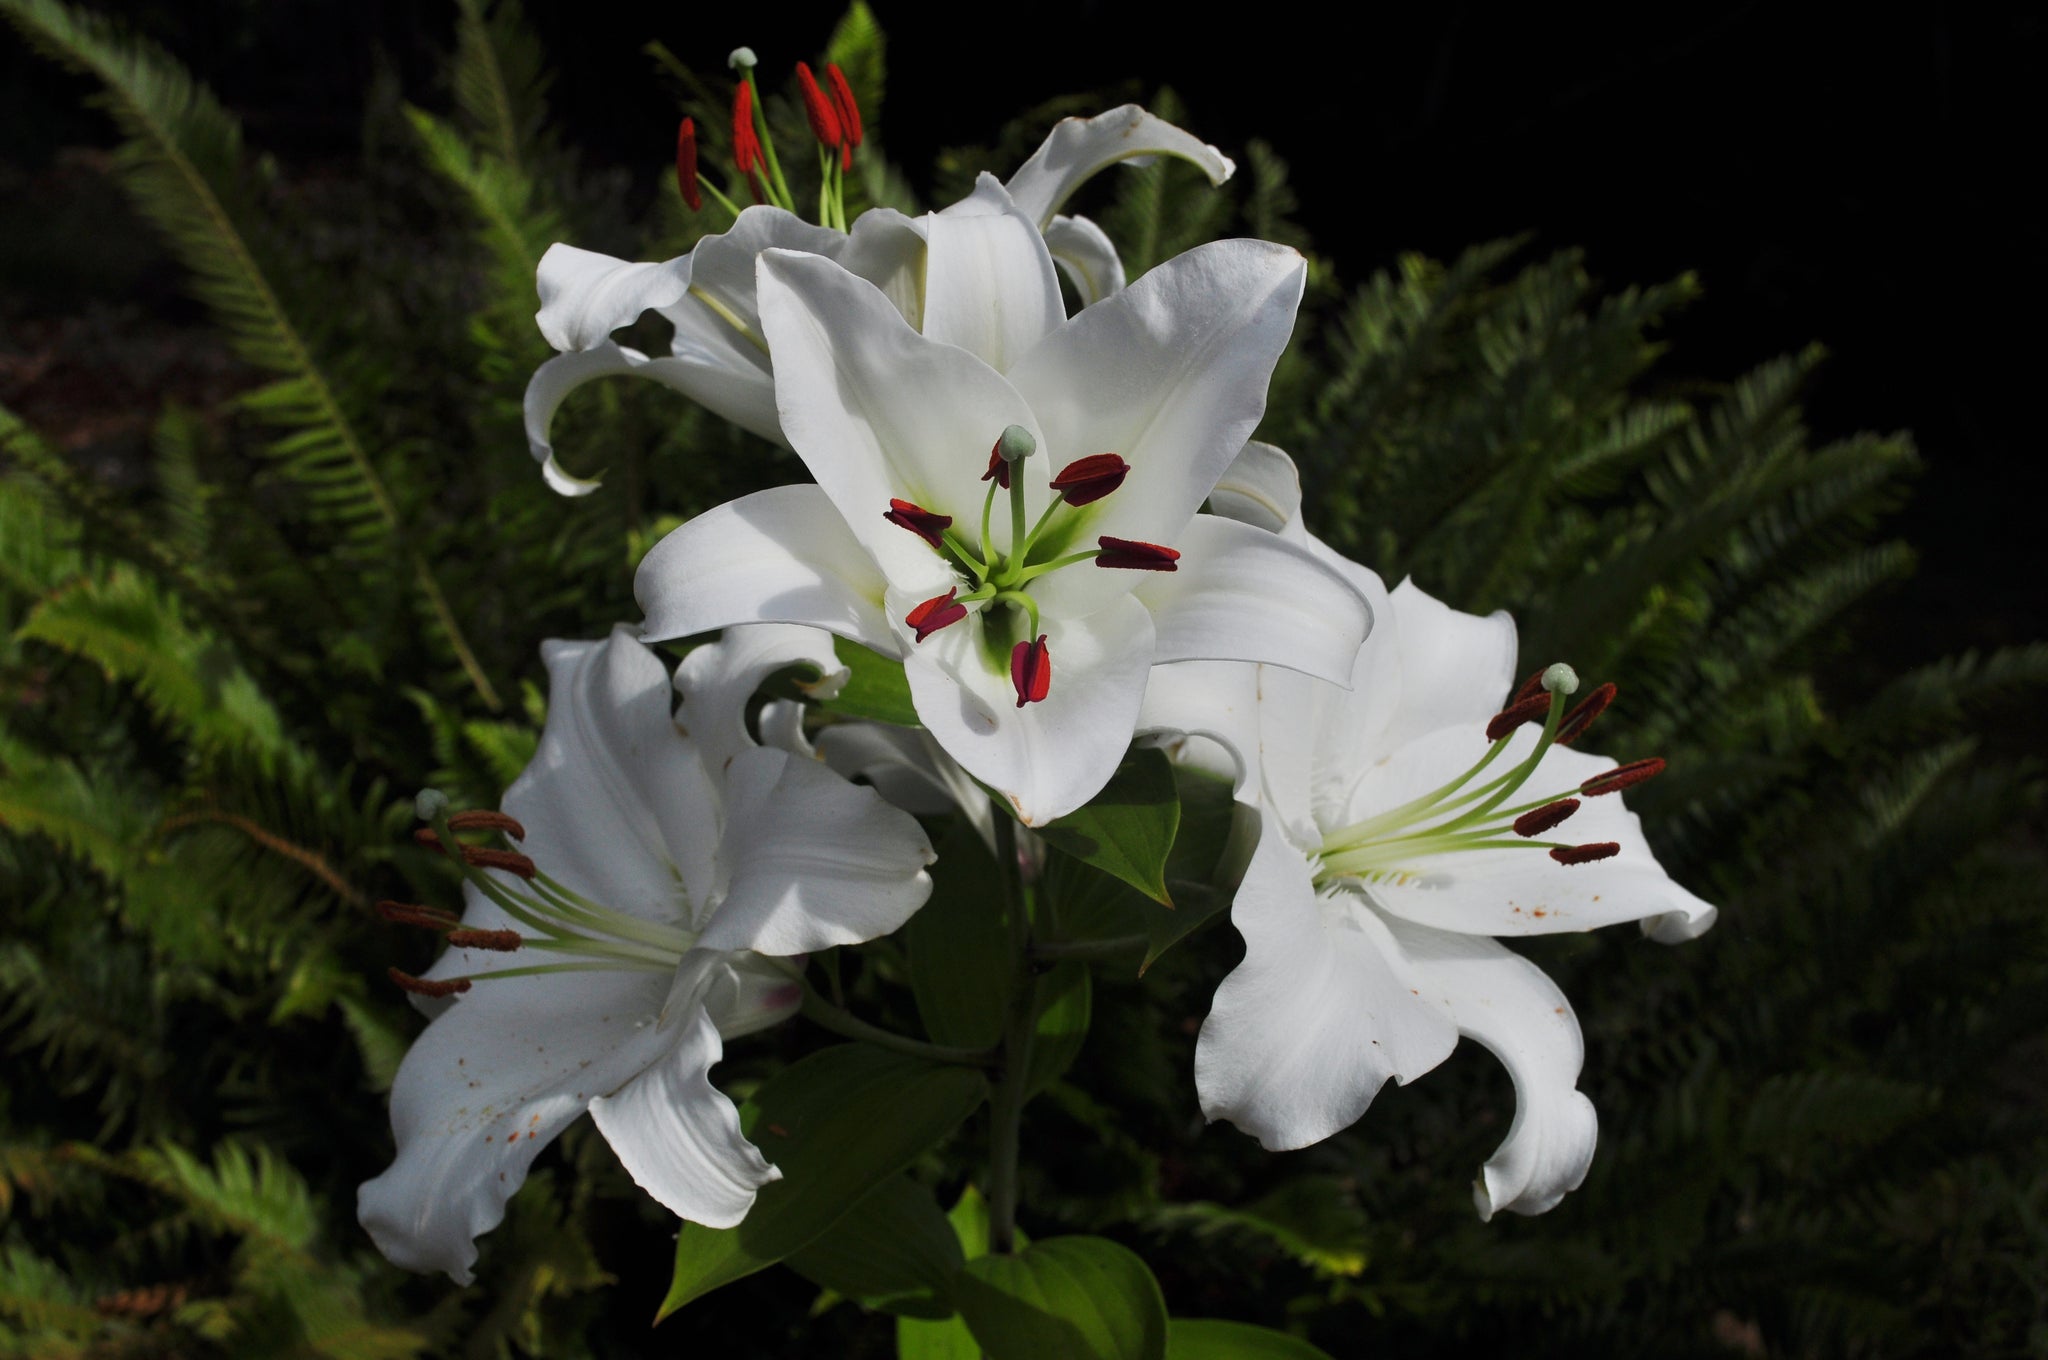
blanca lily flower Casa Blanca Oriental Lily – The Lily Pad Bulb FarmSpectacular, prize winning Oriental Lily! Sports huge, 810" pristine white flowers with striking red stamens, along with an incredible fragrance. Enjoy in the garden and in bouquets. Hardy plants return year after year. 16 18 bulb size. Choose between 1 bulb or a 3 pack. Details Botanical Name: Lilium oriental 'Casa Blanca' Form: Perennial Hardiness Zone: 3 to 8 Flowering Time: Mid to late summer Light Requirements: Full Sun, Partial Shade Flower
Spectacular, prize-winning Oriental Lily!
Sports huge, 8–10" pristine white flowers with striking red stamens, along with an incredible fragrance. Enjoy in the garden and in bouquets. Hardy plants return year after year. 16-18 bulb size. Choose between 1 bulb or a 3-pack.
Details
- Botanical Name: Lilium oriental 'Casa Blanca'
- Form: Perennial
- Hardiness Zone: 3 to 8
- Flowering Time: Mid to late summer
- Light Requirements: Full Sun, Partial Shade
- Flower Color: Pristine white with red stamens
- Flower Form: 8-10" outward facing flower
- Foliage Type: Linear, green leaves arranged in whorls or spirals up the stems
- Height: 3-4 feet
- Spread: 9-12 inches
- Planting Instructions: 6" deep and 9-12" apart. See "Growing Tips" for more detailed instructions
- Soil Requirements: Well drained soil, will tolerate acidic soil, clay, loam, sandy soils
- Pruning: After blooming, cut the withered flower at the top of the stem to prevent seed production and then allow the leaves to wither and turn brown before removing them. The green leaves provide nourishment for the plants.
Tips and Growing Instructions
Visit our How-To Cultivation Library for more growing tips.
Many growers plant lily bulbs in the Fall. However, Spring is a great time for planting lilies. Lily “bulbs” are actually tubers composed of fleshy scales and lack a protective covering. Unlike true bulb flowers, they never go completely dormant and should be handled carefully since they loose moisture very quickly. Essentially, you can plant your new lilies anytime after the ground freezes in Spring.
The most natural location for lilies is on sloping ground with excellent drainage. It’s a good idea to place them with other low plants which can provide shade for the bulb and root system. Prepare the soil with large amounts of organic matter such as leaf mold or compost. Plant with the roots downward and the scales upward. After planting, water well two or three times. Lilies are most effective when planted in groups of three or more. Space them about a foot apart – they will spread and fill this space in no time!
Lilies are great for beds and borders, planted among shrubs, along walls, or in containers. They are incredibly easy to grow and few garden pests trouble them. For best results, plant your lilies where they will have good drainage and mix some leaf mold or compost into the soil. Lilies prefer to have their blooms in the sun and their roots in the shade. Try planting them among annuals or perennials that will keep their roots cool. Always allow the leaves on the stalk to turn yellow and fall off as part of the lily’s natural growth process. This ensures that the bulbous underground part of the plant has gotten enough nourishment and will mean greater growth next year. Each year watch their beauty increase as they multiply!
There are literally thousands of lily varieties and hybrids on the market today. Some of our most popular varieties include Tiger Lilies, Oriental Lilies, and Trumpet Lilies.
Visit our How-To Cultivation Library for more growing tips.
Many growers plant lily bulbs in the Fall. However, Spring is a great time for planting lilies. Lily “bulbs” are actually tubers composed of fleshy scales and lack a protective covering. Unlike true bulb flowers, they never go completely dormant and should be handled carefully since they loose moisture very quickly. Essentially, you can plant your new lilies anytime after the ground freezes in Spring.
The most natural location for lilies is on sloping ground with excellent drainage. It’s a good idea to place them with other low plants which can provide shade for the bulb and root system. Prepare the soil with large amounts of organic matter such as leaf mold or compost. Plant with the roots downward and the scales upward. After planting, water well two or three times. Lilies are most effective when planted in groups of three or more. Space them about a foot apart – they will spread and fill this space in no time!
Lilies are great for beds and borders, planted among shrubs, along walls, or in containers. They are incredibly easy to grow and few garden pests trouble them. For best results, plant your lilies where they will have good drainage and mix some leaf mold or compost into the soil. Lilies prefer to have their blooms in the sun and their roots in the shade. Try planting them among annuals or perennials that will keep their roots cool. Always allow the leaves on the stalk to turn yellow and fall off as part of the lily’s natural growth process. This ensures that the bulbous underground part of the plant has gotten enough nourishment and will mean greater growth next year. Each year watch their beauty increase as they multiply!
There are literally thousands of lily varieties and hybrids on the market today. Some of our most popular varieties include Tiger Lilies, Oriental Lilies, and Trumpet Lilies.
Shipping
Sorry, we do not ship outside the U.S. or to Hawaii due to agricultural restrictions.
We guarantee safe arrival of healthy bulbs, that varieties will be true-to-name, and will grow if planted as instructed, subject to the limitations described in our Shipping and Returns Policy.
We begin shipping our bulbs in mid-February through Spring. Despite what you may have heard, Spring planting of bulbs is not a bad thing, and in fact, there are many advantages to planting in Spring. Visit our Spring Planting page to learn more. Upon arriving, your bulbs and most of your perennials may show signs of growth such as green leaves and sprouts - this is okay and transportation during this time should not harm the plants.
All bulbs and perennials should be planted in your garden as soon as possible to ensure the best success. If you must delay planting, open the bags to permit air circulation and place them out of direct sunlight in a cool, well-ventilated room. Do not place the bulbs where they can freeze. If you have the space, storing the bulbs in the refrigerator is another excellent way to “hold them” prior to planting. If you choose this method of storing your bulbs, be sure not to store fruit with them, as this is detrimental to bulbs.
Plant outdoors when the ground is no longer frozen and the conditions have improved for your zone.
If you have any questions or concerns our customer service team would be glad to help you at any time. Please use our contact form, email us at [email protected], or call us at 541-671-3196.
Shipping Notes
- Free Standard Shipping on $100+ Orders to the USA.
- Except Preorder products are shipped in 48 hours.
- Delivery to the USA:
- Standard Shipping : 3-10 business days
- If time is of the essence, please consider selecting expedited delivery for faster service.
Exchange/Return Notes
- We offer a 30-day return/exchange service after receiving.
- Final sale items are not eligible for returns or exchanges.
- To process your return/exchange, please contact us at [email protected]
- Please click here for more details>>> Return & Exchange Policy
4.3 ★★★★★
Based on 26 reviews
Sort
Product Reviews
★★★★★ 5
Great Quality
Color: Tan, Size: Round 48''
Very nice. Great quality.
WAS THIS REVIEW HELPFUL?YesReportShare
Reviewed in the United States on November 15, 2025
★★★★★ 5
This sheepskin rug is amazing! One of my favorite purchases!
Color: Cream Brown, Size: Round 48''
I loved the first one so much I came back and bought a larger one. The texture and the thickness are pure luxury. Well worth the money and there is no smell.
WAS THIS REVIEW HELPFUL?YesReportShare
Reviewed in the United States on February 4, 2025
★★★★★ 5
Very thick
Color: Ivory White, Size: Round 48'', Color: Ivory White, Size: Round 48''
I was pleasantly surprised that it was as thick and fluffy as it was for the price. I have another that I got that says it’s high pile and isn’t as nice as this one that says medium pile. Excellent for the price!
WAS THIS REVIEW HELPFUL?YesReportShare
Reviewed in the United States on July 24, 2024
★★★★★ 1
Not as pictured
Color: Ivory White, Size: Round 48''
The rug isn’t as pretty in person… choppy looking and noticeable. Different fur lengths and not cozy soft. I have other lamb skin rugs but this one doesn’t measure up. Sent it back…
WAS THIS REVIEW HELPFUL?YesReportShare
Reviewed in the United States on October 2, 2024
★★★★★ 5
Great valur
Size: 2' x 3' (Natural), Color: Gray Tipped
Soft and comfortable. Quality leather nsckrd. Genuine sheepskin. No off odors. I'm skinny and not on tailbone. Hoping this helps. The grey tipped is more of a bluish gray. Pretty but not s true gray.
WAS THIS REVIEW HELPFUL?YesReportShare
Reviewed in the United States on March 31, 2026